WELCOME to CAROLINA PANACHE! I believe our homes should be a haven, a place of beauty and peace that reflect who we are and what's important to us. I'm on a journey to add personality and panache to every corner of my house. For me, good design evolves, grows and changes with the needs of one's lifestyle. I want my home to be creative, to be stylish, to be entertaining, to be real. I hope you will join me on my journey. It's always more fun to travel together.
This blog is all about bringing style and elegance to the home. The art of dressing your home goes beyond hanging a few items on the wall and arranging furniture. Much like a fabulous set of earrings or a new stylish handbag may take your little black dress from fine to fabulous, home accesories and key furnishings can take your rooms from ho-hum to singing the Halleluiah Chorus! Join with me as we discover new ways to add panache to every room of the house.

The Cook's Corner

Welcome to my kitchen! Today I am getting ready for a New Year's Eve buffet.
Now I wouldn't call myself a gourmet chef but I do love to cook.
I am a huge fanof Sandra Lee (Semi-Homemade Cooking)
and if I can save time and still end up with a
wonderful dish, then I'm all for it! Next to interior decorating, cooking is one of my favorite past-times. I love to try new foods and enjoy making up my own dishes. Sometimes they turn out great, other times not so good.
Watch my blog for THE COOK'S CORNER on Wednesdays where I will share some of my favorite recipes as well as new creations.
Yesterday I promised to share with you my menu and some of the recipes
I will feature tonight.
So let's take a look at the menu:
  • Beef Tenderloin with Horseradish Spread
  • Cocktail rolls
  • Royal Seafood Casserole
  • Strawberry-Romaine Salad
  • Assorted fresh vegetables with Creamy Dill Dip
  • Double Cheese Wafers
  • Cool Mocha Pie in Pecan Crust

Most of these items are easy to prepare and can be fixed ahead of time and stored in the refrigerator for a day or two. The beef tenderloin is sliced very thin and makes a wonderful little sandwich when served on a cocktail roll with horseradish spread.

The seafood casserole is absolutely delicious if you like and can eat shrimp. Fortunately, I do not have any shell fish allergies so shrimp is one of my favorites!

The Mocha Pie is heavenly. If you don't try any of the other recipes, you should try this one.

Happy Cooking! And may you have a Happy & Safe New Year's Eve!

BEEF TENDERLOIN with HORSERADISH SPREAD

  1. 3/4 cup vegetable oil
  2. 1/2 cup soy sauce
  3. 1/2 cup firmly packed brown sugar
  4. 1/4 cup red wine vinegar
  5. 2 cloves garlic, crushed
  6. 2 teaspoons ground ginger
  7. 1/2 teaspoon ground coriander
  8. 1 (5 to 6 pound) beef tenderloin, trimmed
  9. 2 teaspoons cracked black pepper

Combine first 7 ingredients; stir well. Place tenderloin in a large shallow dish; add marinade. Cover; refrigerate up to 8 hours, turning occasionally. Remove tenderloin from marinade, reserving marinade. Place marinade in a saucepan. Bring to a boil; reduce heat, and simmer 5 minutes. Place tenderloin on a rack in a roasting pan; sprinkle with pepper. Insert meat thermometer into thickest portion of tenderloin. Bake at 425 degrees for 30 minutes. Reduce heat to 375 degrees, bake 25 min. or until the thermometer registers 140 degrees for rare or 160 degrees for medium, basting frequently with marinade. Cool.

To serve, thinly slice tenderloin across grain. Serve warm or cold with cocktail rolls and Horseradish Spread. Garnish if desired. I like to lay the meat out on a serving platter arranging in an "S" formation. Then tuck curly leaf lettuce around the edges for added color and to "pretty-up" the platter. I usually purchase a prepared horseradish spread and chill it a few hours before serving.

Royal Seafood Casserole

  1. 6 cups water
  2. 1 1/2 pounds of cooked, peeled and deveined shrimp (You can buy these in your local fish market or grocer's fresh seafood department)
  3. 1/2 package thin spaghetti or vermicelli
  4. 1/3 cup butter
  5. 1/3 cup flour
  6. 2/3 cup chicken broth
  7. 2/3 cup whipping cream
  8. 3/4 cup shredded Swiss cheese
  9. 2 1/2 tablespoons dry cooking sherry
  10. 1/2 teaspoon salt
  11. 1/8 teaspoon ground white pepper
  12. 1 (4-oz) jar diced pimiento, drained
  13. 2 tablespoons grated Parmesan cheese
  14. 2 tablespoons slivered almonds
  15. Chopped fresh parsley for garnish

Cook thin spaghetti or vermicelli according to package directions; drain well, set aside. Melt butter in a heavy saucepan over low heat; add flour, stirring until smooth. Cook 1 minute, stirring constantly. Gradually add broth and cream; cook over medium heat, stirring constantly, until mixture is thickened and bubbly. Add Swiss cheese, sherry, salt, and pepper stirring until cheese melts. Remove from heat; add shrimp, thin spaghetti or vermicelli and pimiento, stirring gently. Spoon mixture into a lightly greased2-quart casserole dish. Sprinkle with Parmesan cheese and almonds. Bake, uncovered, at 350 degrees for 20 minutes or until thoroughly heated. Broil 6 inches from heat for 6 minutes or until top is lightly browned. Garnish with fresh chopped parsley if desired.

Cool Mocha Pie in Pecan Crust

  1. 6 (1-oz) squares semisweet chocolate
  2. 1/2 teaspoon instant coffee granules
  3. 2 eggs, beaten
  4. 3 tablespoons Kahlua or other coffee-flavored liqueur
  5. 1/4 cup sifted powdered sugar
  6. 3/4 cup whipping cream, whipped
  7. 1 teaspoon vanilla extract

Place chocolate squares and coffee granules in top of a double boiler; bring water to a boil. Reduce heat to low; cook until chocolate melts. Gradually stir about one-fourth of hot mixture into eggs; add to remaining hot mixture, stirring constantly. Gradually stir in 3 tablespoons of Kahlua and powered sugar. Cook, stirring constantly, until mixture reaches 165 degrees on a candy thermometer. Cool to room temperature. Fold whipped cream into chocolate mixture. Stir in vanilla. Spoon mixture into Pecan Crust (see recipe below).

Just before serving top each slice with a spoonful of whipped cream and chocolate curls.

Pecan Crust

  1. 1 3/4 cups finely chooped pecans
  2. 1/3 cup firmly packed brown sugar
  3. 3 tablespoons butter, melted
  4. 2 teaspoons Kahlua or other coffee-flavored liqueur

Combine all ingredients, stirring well. Firmly press mixture evenly over bottom and up sides of a 9-inch pieplate. Bake at 350 degrees for 10-12 minutes. Press sides of crust with the back of a spoon to flatten. Cool.


Welcome to My First Tablescape Tuesday!

Hello! Today is Tablescape Tuesday and this is my premier posting! Thanks to Susan over at Between Naps on the Porch for hosting this fun tablescape party! Since New Year's Eve is tomorrow, I thought I would do a tablescape to prepare for the festivities.

I decided on a color pallet of Ivory, Gold, and Warm Chocolate.
Let's take a look.


I love to layer my table. Nothing warms up a table like layers of table linens.
I started with an Ivory silk blend tablecloth from Ralph Lauren Home.
I was fortunate enough to find this at a HomeGoods store.
I did not have brown placemats on hand so I turned a silk brown napkin on the
diagonal and laid out my placesetting on top.
I used a matte gold charger in the Italian Countryside motif, then placed a solid Ivory plate on top. The dishes are part of a line from Better Homes and Gardens.
I doubled my napkins by layering a fine Shabby Chic ivory cotton with a scalloped edge inside a gold satin with a jacquard weave.

Here is a wider angle. I tucked the top corner of my "placemat" under but you could allow it to overlap your tablerunner if desired.
The tablerunner is a gold chenille with heavy fringe.
I used the runner as the boundary for my tablescape accessories.

Since it is New Year's Eve, I wanted to keep the theme along the lines of time.
I gathered clocks from various rooms of the house and clustered them down the
center of the table.
I collect Old World Santas and have three that are dressed in Ivory and Gold.
The perfect model for "Father Time" so they were added to the mix.

Here is a full shot of the table featuring "Father Time" and 7 clocks.
Today I will set each clock to a different time zone - New York, Dallas, LA, London, Paris, Tokyo, and of course Charlotte!


I also used a couple of gold metal stands trimmed in crystal teardrops and beads.
This helped to elevate some of the clocks to balance with the largest "Father Time" figure.

I love Mercury Glass! I started collecting it about a year and a half ago.
I featured some of my collection of candleholders in this tablescape.
As seen in this photo I used single Crystal Goblets and to play off the crystal and add sparkle,

I used some clear acrylic beads and scattered them along the table top.

The last accessory I used was large gold orbs. A rather whimsical nod to the
"Big Ball" in Times Square. I just randomly placed them around the base of the tablescape.

Here's one more look down the table.
I guess all that is missing is Baby New Year
but I just couldn't find a baby in the house!
Below is a close up shot of one of the Old World Santas
a.k.a. "Father Time".
Notice the pretty gift he carries on his shoulder.
That gift can represent our NEW YEAR.
You see another year IS a gift from GOD.
None of us are promised tomorrow
but by grace we live and breath and have our being.
I've been thinking alot about 2009 and how I will spend it.
What direction will my life go? How will I use my gifts and abilities
to honor the One who gives all life? I know that my steps are ordered so I move
confidently into the New Year with hope, peace and joy.
I pray that as you celebrate by ringing out the old year
and ringing in the new that you will take a moment
to give thanks for the gift of another year.
May PEACE, HEALTH, and GOD'S FAVOR
rest upon each of you I pray!
HAPPY NEW YEAR!

Tomorrow I will be posting the menu
for our NEW YEAR'S EVE buffet.
Stop back by for some yummy ideas!


Let's Talk Ambiance - Lighting & Atmosphere (Step 4)

In this post we will talk about the fourth element in accessorizing your home - AMBIANCE. This refers to the atmosphere or feeling you create in each room. Nothing plays as important of a role in this as LIGHTING. Lighting romances your rooms. It can create a relaxing, welcoming, atmosphere. We have all heard that "moods" can be set with the right lighting and that is a lesson that professional home stagers have learned well. Recently I toured a home that was staged to sell. Lamps glowed in every dark corner, candle light flickered in pretty wall sconces and strategically placed overhead lighting showcased art and focal points. Designer Laurie Smith stated, "Lighting is possibly the most powerful tool in design. What is the point of investing in furniture, fabrics, accessories, and artwork if you are living in the dark?"
There are three main sources of lighting - natural light or daylight, incandescent light and fluorescent light. While candle light adds ambiance to your rooms it is not considered a main source of lighting but we will include it in this discussion.
It would take forever to cover all aspects of this topic - lighting -
but for the purpose of this post, I want to focus on lamps, wall sconces, and candle light.
First, let's talk about lamps. Is there any more versatile or individual choice for lighting? If there were no other way of lighting a home, I would not mind as long as I had loads of table and floor lamps. When used properly lamps not only serve a functional purpose but lend a decorative influence too. In the photo above & below (Ballard Designs) the lamp actually completes the table grouping and adds interest to the design. Above the black shade plays up the black velvet window panels and the reflective surface of the lamp base complements the silver planter opposite.
Lamps can also work to balance large furniture pieces and highlight art as is the case in the photo above. A collection of small things on the chest would distract from the framed art and would serve no functional purpose in the hall.
I have been known to do a little "dumpster diving" in my time and one of the things I love to find is unique, vintage lamps. I have several that have come home with me to find themselves made over with a can of spray paint and a new shade. As the the New Year progresses I will share some of these projects with you. It is simply amazing how adding a new shade can transform trash in to a valued treasure.

Next up, WALL SCONCES and CANDLELIGHT. Wall sconces are the perfect choice when you want soft, low light or need to illuminate a small area. You can chose from electrical or gas powered sconces or candle sconces. If your home is not already wired for wall sconces, it can be a little expensive to hire an electrician to wire them for you. Gas is even more involved. I prefer to use candle sconces where electrical wiring is not readily available. You can achieve a very similar affect with a lot more ease. Another benefit of candle sconces is color and fragrance. Not only will candles add soft light, their fragrance can add seasonal flair and color to your room. This is their greatest attraction. Simply achieve this by changing out your candles with each new month or season. I burn candles year round and go through a large inventory. My favorites are Sandlewood, Fig, and Baked Apple Pie.

Above -Sandlewood Pillar Candles set the mood in the Living Room.
The glow of candles can create soft, soothing, and warm ambiance in any room. It has been said that candlelight adds a sense of mystery and romance to the home while turning "eating" into "dinning". I use candles in every room of my house except the children's rooms. There is such a wide variety of candles, candle holders and decorative accents available that you can find an appropriate style for every room.
Above - An all white candlescape adds impact to a garden party.
Who says that candles are reserved for indoors? Try clustering candles is several sizes and shapes for your next patio gathering. Choose a color story such as Red, White and Blue or go monochromatic like the photo above. Candles make a simple and easy centerpiece while adding a touch of panache to your table setting.
This post completes our
Four Elements of Accessorizing Your Home
In review:
Step One - Wall Art
Includes framed art, mirrors, plaques, sconces,
shelves, wall planters and ledges.
Step Two - Accessories & Accents
Includes decorative plates, figurines or statues, clocks, pottery,
glass containers, easels, baskets and accent furniture.
Step Three - Plants and Floral Arrangements
Includes wreaths, swags, topiaries, pre-potted plants, florals,
green foliage and garlands.
Step Four - Ambiance
Includes lighting of all types, container candles, pillar candles, votives,
tea lights, lamps and sconces.
Tomorrow is Tablescape Tuesday hosted by Susan at BetweenNapsonthePorch.
I will be joining the fun by posting my very first tablescape featuring a
New's Years Eve theme. Does anybody know what time it is??
See you tomorrow!


Let's Talk Plants & Florals (Step 3)

Every home can benefit from the freshness of flowers or plants. What better time than January to add life to your home. Each year after CHRISTmas I feel as though my home looks bare. Once the holiday decorations have been packed away for another year, I begin to rearrange, repurpose and recreate my rooms. Now is the perfect time to add a nice Parlor Palm or Boston Fern to replace that Evergreen. I like nothing better than to walk into a room and see a vase of prettily arranged flowers or a lovely English Ivy that has been allowed to spill over the edges of a rustic garden urn repurposed for indoor use. Plants and flowers naturally bring life to your rooms. Not only do they bring the outdoors inside but they add the third step of accessorizing your home. They add color and texture to your decor. Unfortunately most of us do not have a green thumb. I sure don't! My husband is the one that can make things grow so a lot of times I opt for faux florals to add seasonal color and texture to my space. My floral preferences are always Roses, Hydrangeas, Tulips, Magnolias and Daisies. On the foliage side I prefer Parlor Palms, English Ivy, Boston Ferns and Magnolia Leaves.
Decorating with florals include such things as wreaths, tabletop arrangements, fireside baskets or even a single stem placed in a glass vase. I personally have a very traditional aesthetic and love an English Garden style floral arrangement. However many of my clients love a clean, modern look so I encourage them to decorate using simple stems that add pops of color or tropical foliage to complement their decor. In this photo I've used a punch of seasonal color - RED - in my entry. Just because CHRISTmas is over doesn't mean that I have to do away with all my red! This is a polysilk arrangement of Tulips, English Ivy and Holly Berry that I assembled in an iron and glass hurricane container. I love the way the bright hue greets guests with a cheery hello.

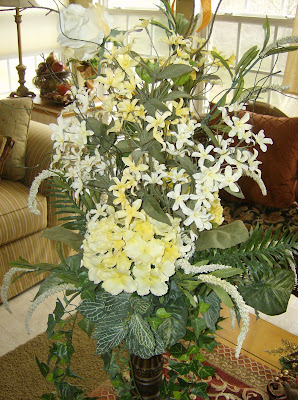
When using polysilk stems, I always stay close to nature's color palette. Soft yellow, buttery cream, white, red and pink and loads of green - in every variation of the hue - are usually my choices. The arrangement above was assembled for a head table centerpiece for an event I decorated for. It was arranged in a 24" glass vase and weight was added to the bottom of the base with beads of topaz, gold and clear glass.
The finished arrangement is about 3 1/2 feet tall and features Roses, Apple Blossoms and Boston Fern.
The beauty of decorating with florals is that they add visual panache without defining the color or style of the room. There are very few rules when decorating with plants because the objective is to add life and layer in texture.


Small indoor trees, house plants, foliage and flowers are a graceful way to soften awkward angles, add punch to dull backgrounds and disguise unattractive areas. They can also draw attention to a favorite piece of furniture
and cause a piece of art to come to life.
This arrangement was designed on a pillar candle holder. I needed something tall and thin for a narrow ledge and found the candle holder to be just the right size. I simply used florist tape to secure a block of florist foam on the flat part of the candle holder and proceeded with tucking in my flowers and greenery.


This shot highlights a collections of ferns - all polysilk - arranged in an urn. I like the way this arrangement softens the corner where I keep my umbrella stand.

When using live houseplants I usually select English Ivy, Needlepoint Ivy, Swedish Ivy or China Doll. I find these plants to be fool-proof. I like using variegated varieties as well as various shades of deep green. In the spring and summer I usually clip fresh magnolias, tea roses, tulips and daisies from my yard. However, fresh cut flowers will last about 5 days before they start to wither. If you want the beauty to last or don't feel confident keeping houseplants alive, I would recommend poly-silk. Places like Hobby Lobby and Michaels have beautiful stems and most of the time you can catch a 50% OFF sale!

Here's some tips for florist-worthy arrangements:
  1. Begin by gently bending the stems and leaves with your thumb and forefinger into soft, natural curves before inserting the stem into the foam.
  2. For a more natural look, turn the arrangement as you add flowers and leaves. Also insert the stems at various angles so flowers face different directions.
  3. Always work to achieve "breathing space" around flowers. This will keep your arrangement from looking overly crowded and will lend an air of natural elegance.
  4. Use both bud and bloom. When working with flowers at different stages of growth, you add interest and a sense of freshness to your design. Always place buds at the top and away from the full blooms.
  5. When using a single flower in your design - roses for example - always purchase odd numbers otherwise you may be restricted in designing movement within your arrangement.
  6. Long, thin flowers can give you the overall shape or rhythm while large, round flowers provide the accents or focal point. Multiple blossom flowers add to the fullness of the design.
  7. When using opaque containers, start by inserting floral foam inside to support stems and hold flowers in place.
  8. If you opt for clear glass containers, add materials in the bottom that layer in interest such as sand, shells, glass beads, marbles or Spanish moss. This will hide the florist foam and give extra support to the arrangement.
  9. If using a container with three legs or feet, always position it so that one leg is shown directly in the front. This grounds the arrangement and adds interest.
  10. Lastly, for more permanent designs, dip the ends of your stems in hot glue, white glue or pan glue before inserting them in the foam.

Our next topic will discuss adding ambiance to every room of your home. We will be talking about lighting, atmosphere, fragrance and candlelight.


Let's Talk Home Accessories - Your Signature Style (Step 2)

Home accessories are the finds that express your personality and bring your home to life. They proclaim your SIGNATURE STYLE! These include vases, accent furniture, candle holders, glass pieces such as containers or planters, decorative plates, floor baskets, clocks, easels and figurines or statutes. These items are mostly used on table tops, shelves and ledges throughout the home. Accessories work together with your framed art to add a touch of personal style and your own decorating sensibility. When you choose accents that repeat the subject or theme in your framed art, you add a 3rd dimension to your room. Life and movement are added and you create interest. In this photo you see how the wall art highlights single flower stems using a modern aesthetic. To accessorize this room a contemporary selection of accents was chosen. The potted orchid in a simple glass vase, the single black candle holder, black wooden storage cubes and clock is really all that was needed to add visual interest to the flat surfaces of the room. It is fun to add a single element that seems slightly out of place. The clock is very traditional in its style and detail but works wonderfully with the other black furniture and accent pieces.

In this photo the color story is Black, White and Red so the accents take their que from the wall art. ALWAYS take your que from your wall art. Otherwise your rooms can look cluttered with no cohesive thread to hold them together. Two identical urns were used to play off the urn in the photo that is only partially shown. I love to use multiples of items when accessorizing a room. For a very traditional look, use pairs. For modern, contemporary or casual interiors odd numbers work best. While we are on this photo let me point out that three thin book volumes were used to elevate the clear glass hurricane. This was done to raise the rim of the hurricane to balance better with the height of the urns. I love to use books for this purpose.

Here we see a casual display of country elegance. Notice how the mirror is leaning on the wall rather than hanging. That sets the tone for the cluster of casual accents used to enhance the mantle. The colors and feel are repeated on the table in the statue of the rooster, stacked serving plates and flasks. I really like the way the table runner plays off the fruited topiaries placed on the mantelpiece.

This vignette is slightly romantic in aesthetic. The lamp with crystal tear drops, the heart shaped photo frame, the garden angel all lend a gentle romance to the table top which pairs perfectly with the lovely landscape in the wall art above.

This is one of my favorite pieces. I use this in my guest bedroom. I love magnolias so when I moved to my current house I was excited to have a magnolia tree in my front yard. Using the magnolias from the wall art, a floral arrangement was designed to bring the room to life. The subdued color story of white, cream, brown and antique gold is timeless and restful. While the finishes on the hurricane which was used to hold the arrangement and the candle holders are not the same, the swirling details at the base and similar shape work well together. Don't worry about matching your accents rather work to achieve a coordinated look for your rooms.

In this example, we see yet another romantic and traditional vignette. The soft pink walls are the perfect background for the antique gold accessories. I simply love the scale of the candle holders on the floor. A great balance for the accent chair (you can only see a small portion of it to the left of the photo). The wall art used in this setting is the antique gold mirror and shelf. Many people don't use shelves or ledges above table tops but I have found this to be a great way to add dimension to a grouping and to showcase a collection. Notice how the antique gold finials (collection of 3) are split up - two on the table top and one on the ledge above. This naturally created movement for the eye.

I love the casual, beachy feel of this grouping. I like the way the birdhouse plays off the rustic finish of the white accent table.

The fallen blooms at the base of the container in the picture above inspired the floral spray resting on the table below. A large book was used to elevate the middle of the arrangement.

This final photo shows a simple accessorized hearth. Two large ivy topiaries are used to dress up the fireplace. The scale is perfect for the size of the firebox and the repeat of pairs adds a traditional flavor while the rustic planters keeps the scene casual enough for a family room.
A good mix of home accents and accessories uses several tricks and tips to balance its organization. Here's a quick list I share with my customers:
  1. Arrange items in threes or fives. Objects work best when used in odd numbers.
  2. Create a loose triangle by grouping a small, medium and large item together.
  3. When working in a room with a monochromatic color story, use lots of texture in your accessories. Select an accent with a shiny, matte and textural finish.
  4. Another way to add texture and interest is to group items of different material but similar shape or purpose. Try using metal, woven fiber and ceramic together.
  5. Change your accents seasonally. This simple act can refresh your home quickly and at little expense. I like to re-mix my interiors every three months. Now that Christmas is over, I will pack away the holiday decor. This is the perfect time to re-mix my rooms.
  6. When in doubt, group items together that are similar in color, shape or purpose. This is the fastest way to fill empty surfaces and add dimension to your home.

Our next post will deal with Florals and Plant life. We will show how to use real house plants to enliven your rooms and breath life into your decor as well as how faux florals can add seasonal style and color.


Let's Talk Wall Decor (Step 1)

Let's talk accessorizing your home! Most clients tell me that they have no idea how to arrange home furnishings and accessories. They usually have no problem choosing the items they want but once getting them home, they are unsure what to do with them. Through four quick and easy steps, you can have the confidence to pull together the look of any room in your house.
First let's discuss WALL DECOR. This includes framed art work, mirrors, shelves, sconces, plaques and wall planters. Using accessories that complement your room's color scheme and enhance its style will add punch to your living space. In the picture above, a large oil painting is used as the feature in this symmetrical grouping. A pair of antique gold wall shelves are used on either side of the painting and provide a space to display some wooden finials. Rather than "hung" on the wall, this painting is sitting on the table below and "leaning" on the wall. This lends an artsy look to the arrangement. I love the way the two tall evergreen and fern arrangements add life to the overall grouping. We'll talk about florals and greenery in Step 3.
In this photo, two framed prints of the same size are hung one on top of the other rather than the traditional side-by-side arrangement. I rather like this approach. Two metal wall plaques are then used to extend the width of the grouping and balance it above the sideboard. Notice how the plaques are positioned in the lower 2/3 of the grouping. As a rule of thumb you will always want to "ground" your wall accessories to a piece of furniture or other accessory that is sitting on the floor. This will prevent your groupings from looking as if they are "floating" on the wall. I love this pair of antique lamps. They add great ambiance (Step 4) to this dinning room vignette and complement the golden frames of the prints above. The black, cream and gold accessories work wonderfully with the fresh minty-green wall paint. Very elegant.
Now I want to talk about scale and proportion. Notice that in the first photo the large oil painting is flanked on either side by smaller wall shelves and finials. Imagine who off balance the grouping would look without the tall evergreen arrangements that sit on the table below. They add needed balance and keep the shelves from looking out of proportion to the painting. In the second picture we see that the wall plaques are scaled in proportion to the framed prints. I find that this is one of the most popular challenges and biggest mistakes in most decor. On this dinning table a large fern is used at the centerpiece. Because of the height and width of the piece, two large painted urns are used on either side to balance the table top. I really like the way the painted urns add a little color to the room and break up the neutral color palette. Using a few smaller items in the table scape adds interest to the display and gives the arrangement some movement.

Here is another example of good use of scale and proportion. The tall lamps anchor the framed art to the table below. The scroll work above the painting frames the grouping and gives upward movement to the grouping. This is a great technique to use if you have high ceilings. Why waste all that wonderful space?

In this photo we see how the sofa is used to ground the grouping above. This vignette incorporates all four steps of accessorizing a home:
Wall Decor, Signature Accessories, Florals and Greenery, and Ambiance.


Finding Inspiration

Okay, you are ready to begin a new decorating project. But you don't know where to start. You sort of have an idea of what you would like but you're unsure how to pull it off. The first thing is to find INSPIRATION. I usually sit down and write out what I want to accomplish. It's like writing down your goals. I guess that is a carryover from my days in the corporate world. Once I have written out the scope of my project, I begin looking for items that inspire me. A color in a fabric or the line on a piece of favorite furniture. You can find inspiration everywhere. The key is knowing what you are trying to accomplish. That's why it is so important to begin with a written idea or goal. I like to visit model homes, design centers, showrooms and retail outlets. I take along my digital camera and snap as many pictures as I can. Every time I see an item, color or shape that captures my attention, I memorialize it with my camera. Flipping through home decor magazines and books is another great source. Recently, I took a day to seek out inspiration. I was able to visit a new home community where Ryan Homes is creating a fabulous new neighborhood. I then traveled over to Charlotte to visit my favorite place for home accents - the Black Lion. The picture above was taken in the design showroom at the Black Lion in Charlotte. I just LOVE the scalloped console table. I find myself drawn to black as an accent color. Every room should have at least one piece in black. See the details on the front of the table? This just might find its way into my house! (Sorry for the glare.)
This sofa was in the same room as the table above. (See it in the background.) Living with three guys, I am always on the lookout for pieces that are stylish and sophisticated but not "girly". This sofa would be the perfect addition to our family room.

I currently live in a Ryan Home. Ryan is building a new community not far from where we live. So I decided to pay them a visit and see their model. It just happened to be the same floor plan that I have - the Rosemont. I love the color palette used. Gold, bronze, shades of muted orange and warm apricot. Ryan does a great job selecting decorators to furnish their model homes. I haven't toured a single one I didn't like. When you are thinking about refreshing your interiors, pay a visit to your local new home builder. Inspiration can be found everywhere!

This is the dining room of the model home. I was shocked yet surprised to see the decor. This dining room could be in my house. Same colors, same style, same feel. Beautiful. I love using large mirrors in the dining room. My parents gave me a lovely gold gilt-frame mirror for Christmas one year. It currently graces my dining room wall flanked on either side by smaller framed prints. Even the gold walls look like home. I use Laura Ashley - Gold 5 in my dining room. It is so warm and inviting. Love it!
Here is another photo from my trip to the Black Lion. This grouping caught my eye because of the shades of orange and apricot used in the pillows and accent chair. I currently have a love affair with orange. I've used it in my family room, sunroom and bath. Orange is a great color for creating energy. Not as heavy as red and much more exciting than yellow. Since I entertain a lot, I look for room furnishings that create excitement, energy and panache.


LinkWithin

Blog Widget by LinkWithin